Ever picked a dish at a restaurant just because the picture made your mouth water? That’s the power of a good image—it grabs your attention and makes you want to try it.
Just like at the restaurant, putting pictures next to items in your Shopify store can really boost your sales. People love seeing what they’re about to buy!
When shoppers see what your products look like right away, they can find what they want faster. No need to click around—they get straight to the good stuff!
This way, fewer visitors leave your store frustrated because they couldn’t find what they were looking for. It’s all about making shopping easy and fun!
Here’s some great news: making a Shopify menu with pictures is easy-peasy, especially if your theme lets you add a mega menu. Let’s walk through how to do it!
Here’s how to add images to your Shopify menu.
Option 1: Using A Theme That Supports A Mega Menu
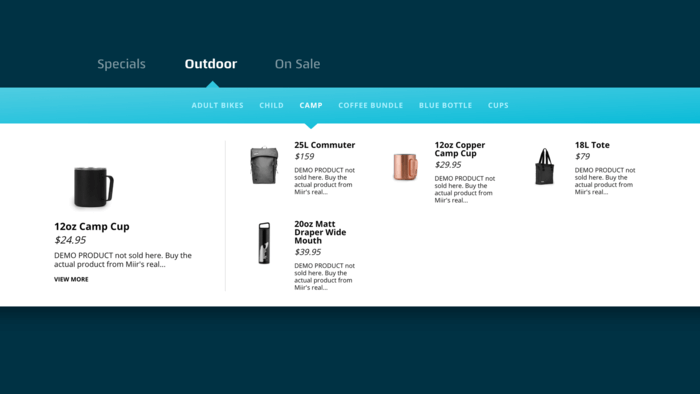
If you are using a Shopify theme that can support multi-level mega menus, you typically need to make sure that you have images associated with each of your products or collections so that they can show up in the dropdown navigation menu.
Remember to always use clear, well-lit, and accurate images that help to give your customer a good sense of the size, color, and dimensions of the product.
How To Add Images To Your Shopify Menu
- Create image associations
- Add your products or collections to your dropdown menus
- Use Shopify apps for further customization
1. Create Image Associations
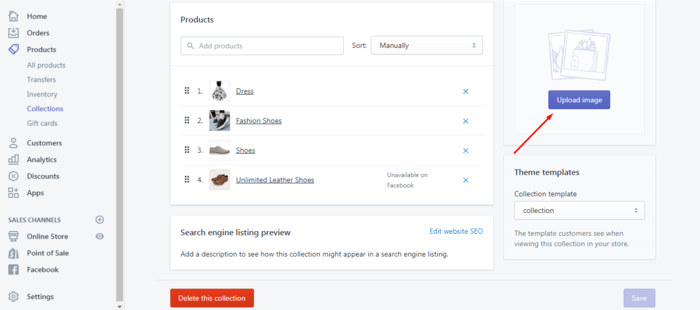
To associate an image with your collection, follow these steps.
- Go to your Shopify dashboard.
- Go to Products > Collections.
- Click on the name of the collection.
- Select Upload image on the right to associate an image.
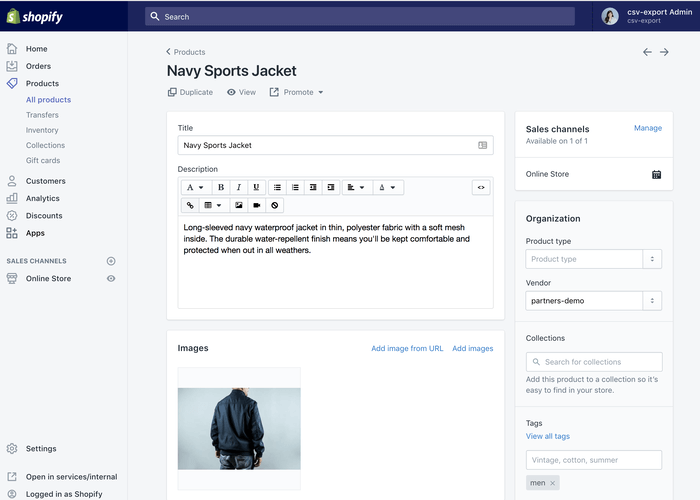
To associate an image with your products, follow these steps.
- Go to Products > All products.
- Select the product you want to add an image to.
- Click on Add images.
2. Add Your Products or Collections to Your Navigation Menus
- Go to your Shopify dashboard.
- Click on Online Store > Navigation.
- Select the menu you want to add items to at the appropriate level. For example, the top-level item will appear in the main menu of your store.
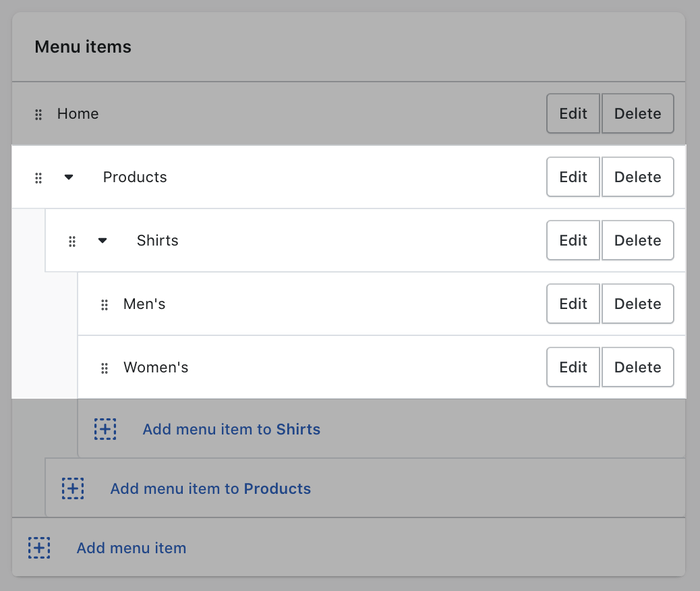
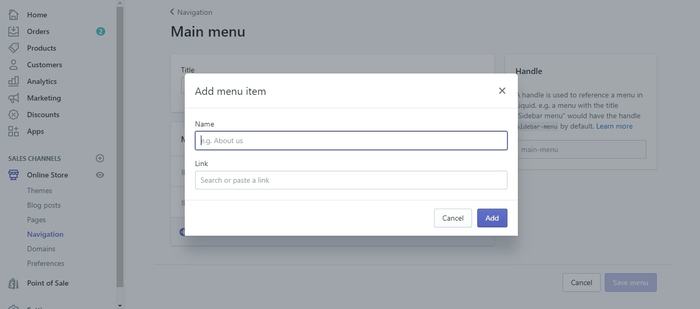
- 4. Select Add menu item.
- 5. Type in the title of the menu item and click on the Link field. You can choose to link to a product or collection. You can also apply filters to control which products in a collection the menu will link to.
- 6. Select Save menu.
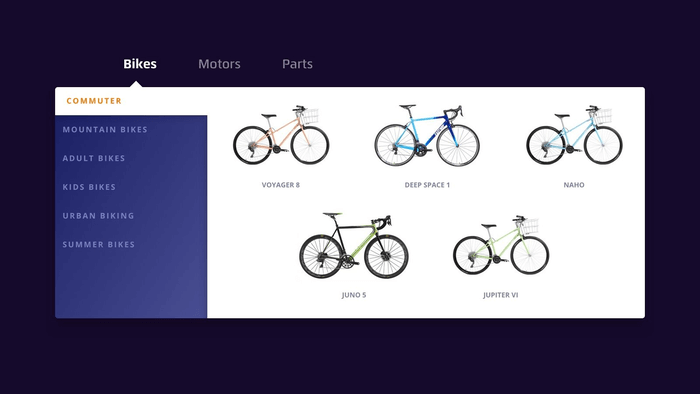
If you have already associated images with your menu items, images should now show up as part of your mega menu.
If you need to customize your navigation menus further, you may need to go into your theme editor and modify the code under the header section.
Sometimes you might want to show your menu images on a different level which will require further customization.
While this is a fairly simple solution, you can streamline the process even further with the Meteor Mega Menu app.
It also offers more options if you want something that is outside of the template-specific customization settings.
3. Use Shopify apps for further customization
If you just want an easy solution that works with any Shopify theme, a Shopify app is the way to go.
I found an easy-to-use one below 👇🏻
Option 2: The Meteor Mega Menu App
The Meteor Mega Menu app provides you with more settings to transform your Shopify main mengu and drop-down menus.
The app comes with several pre-built templates.
The advantage of using this app is that you don’t need to use a theme that will support the use of a mega menu.
You can have a dropdown menu with images in your shop, regardless of your Shopify theme 😄️
Conclusion
Adding images to the drop-down menu in your Shopify store can increase engagement with your visitors and allow you to harness the benefits of using images for branding.
If any of the Shopify themes you have does not allow you to add mega menus or support the addition of images to your mega menu, you can opt for a Shopify app that provides you with more capabilities to customize the menu for your online shop.
Even if you have a theme that can support the use of mega menus, you might appreciate the added functionality to customize your Shopify menus.
")
")