You’ve got a vision of the perfect store design in your head, but no Shopify theme or anything in the Shopify app store seems to be able to make your dream a reality.
Well, you’re in luck—by adding your own custom CSS, you can get your shop looking exactly how you want it to.
Here’s how to add or edit the custom CSS for your Shopify store.
How Do I Add Custom CSS To Shopify?
- Backup Your Site
- Navigate To Your Theme Files
- Edit or Create a Custom CSS File
1. Backup Your Site
Okay, you don’t technically need to backup your site first.
But even CSS gods make mistakes.
So if you have any doubt that you might accidentally make an error in your CSS, I’d highly recommend backing up your site before you make any changes.
This will allow you to revert your shop back to its current state if you make any mistakes.
Here’s a guide on how to backup your Shopify store.
All done (or just super-confident?)—onto step 2!
2. Navigate To Your Theme Files
To get to your theme files, log in to your Shopify admin at your-store-name.myshopify.com/admin
(replace your-store-name with… your store name).
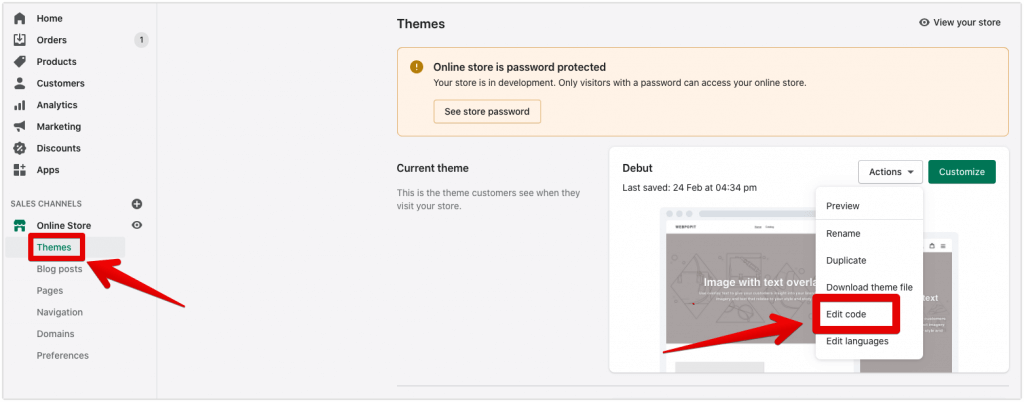
Then on your left-hand sidebar navigate to Online Store -> Themes, which should be under the heading “Sales Channels”.
Then to the right of the heading “Current theme”, there is a dropdown button labeled “Actions”.
Click on this button and click “Edit code” in the dropdown, as shown in the screenshot below:
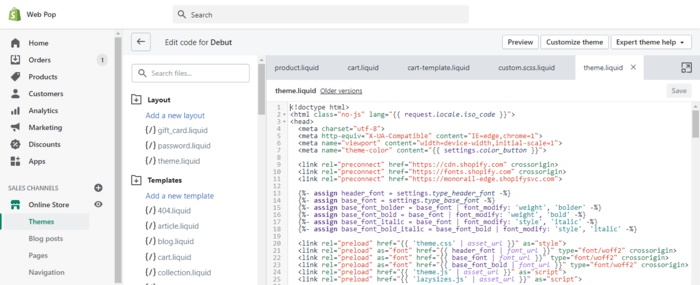
3. Edit or Create a Custom CSS File
You’ll now see a list of all the files that make up your Shopify store.
From here we have two choices: we can edit an existing .css file, or we can create a new one.
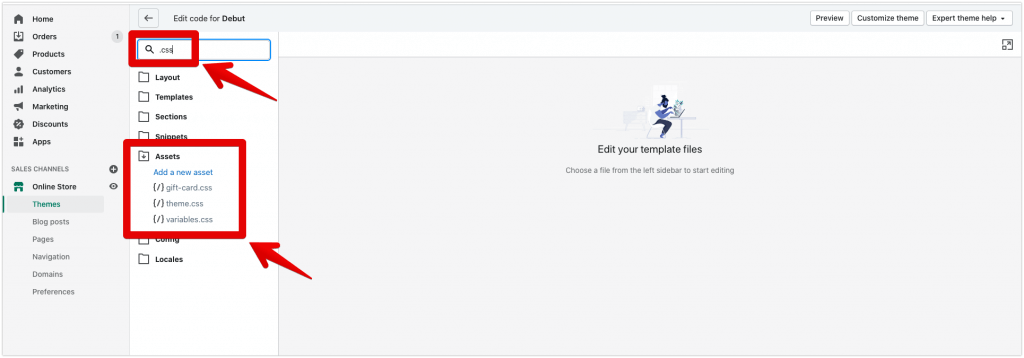
To edit an existing file, type in .css into your search bar.
You should see all the CSS files that make up your theme, as shown below:
To exit existing CSS, open up your theme.css file.
Here you can edit existing CSS, or add your own.
While editing your CSS file is quick and simple, the downside is that it’s hard to keep track of the changes you’ve made.
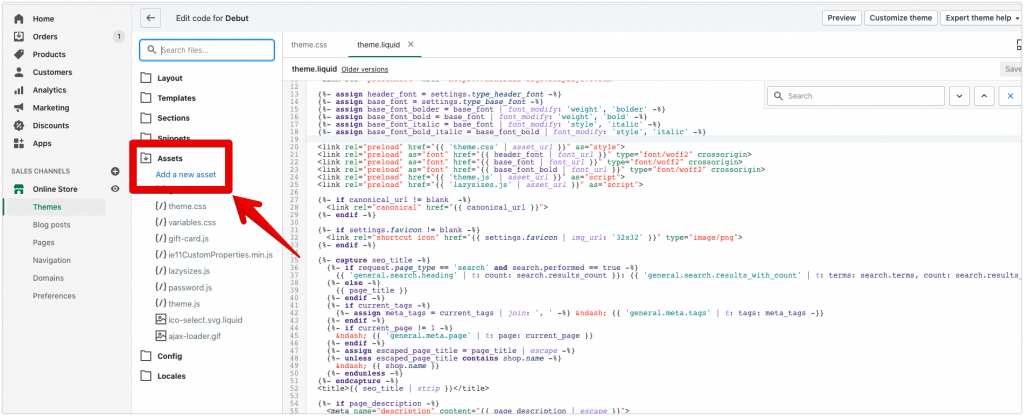
Adding your own CSS file is a great move for the long run. It helps you keep tabs on your customizations, even though it’s a bit more work to start. Just click “Add a new asset” under “Assets” to begin. This step sets you up for easy updates later.
From here you’ll see two options: “Upload a file” or “Create a blank file”.
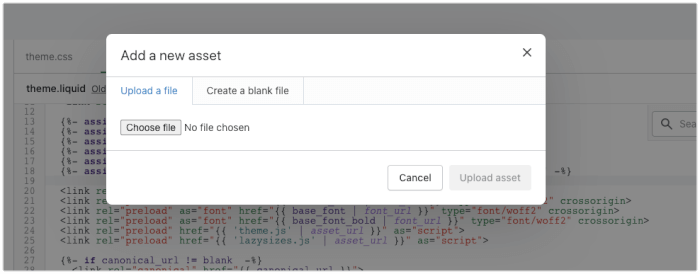
If you have a CSS file ready that you created in another application, go ahead and upload it.
Otherwise, click “Create a blank file” and label it “custom”, making sure that the file extension is set to .css.
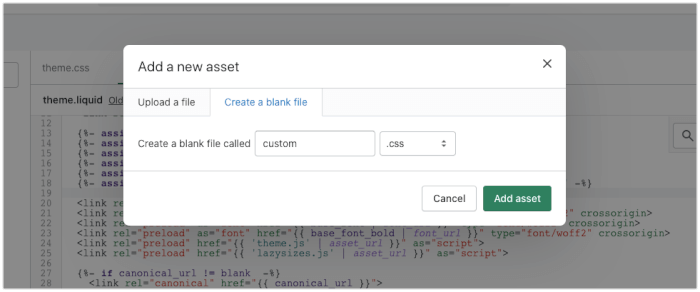
Add all of your custom CSS to this file.
Now navigate to your theme.liquid file using the search bar again.
Click on the file to open it, and locate a line that looks similar to this:
<link rel="stylesheet" href="{{ 'theme.css' | asset_url }}" type="text/css" media="print" onload="this.media='all';onLoadStylesheet()">(the easy way is to Ctrl + F rel=”stylesheet”)
Underneath this line, paste this one:
<link rel="stylesheet" href="{{ 'custom.css' | asset_url }}" type="text/css">Remember that the file name needs to match the name of the CSS file that we just uploaded/created.
So if you chose a different name for your CSS file, replace ‘custom.css’ in the code snippet above with the name you chose.
Once you’ve done that, save your stylesheet by clicking the “Save” button in the top right-hand corner of the editor.

Aaaaand you’re done!
Now you can add code to your custom.css file and your changes will show up on your website.
Click the Preview button on the top right to see how your website would look like and check that everything works before you publish your changes.
Make sure you save a copy of the snippet above and your custom.css stylesheet.
Each time your Shopify theme is updated to the latest version, you’ll have to include the snippet again and create a new CSS file if it has been deleted.
(This is a temporary requirement until Shopify provides a better solution).
How Do I Create A Custom CSS File?
Go to Online Store > Themes > Actions > Edit code. Scroll down to the Assets section on the left venue and select Create a new asset. You’ll have the option to choose the file type and name it.
How To Edit CSS In Shopify?
Go to Online Store > Themes > Actions > Edit code. The master template included in all pages is the theme.scss.liquid file. It is recommended that you add all custom code in a new custom.scss.liquid file under Assets and link it to your main theme.scss.liquid file. Make a backup of your theme files in case something goes wrong.
Where is CSS found in Shopify?
- Log in to your Shopify admin dashboard
- Click Online Store
- Select the Actions button on your site theme and choose Edit code
- You should see your CSS code
Conclusion
It’s easy to add Shopify custom CSS code to add styles and apps that the Shopify platform rich text editor and standard theme settings cannot do. You can even customize your Terms of Service pages.
However, if you’re having issues modifying your theme code or find HTML and CSS too complex, you can ask the support team for help or hire a Shopify Expert.

")