Collections in Shopify let you categorize your products in helpful groupings that make the shopping experience faster and easier for your customers.
They also allow you to curate your top products giving you a convenient way to feature your bestsellers and seasonal items.
That means higher conversions and more sales for your business.
Creating subcollections in Shopify can be tricky. It’s hard to find straightforward help that doesn’t just try to sell you a plugin or service. But don’t worry, I’ve got you covered with easy steps to follow.
It’s time for that to change.
I’ve simplified the steps to creating Shopify sub collections and link lists so even a brand new user can figure out how to add sub collections to their Shopify store.
If you already know what subcollections are and why you should use them, then you can click here to navigate straight to how to create a subcollection in Shopify.
You can also click here to navigate to the instructions for enabling product tag filters.
Otherwise, let’s jump into what a sub collection is, and why you might want to use one in your Shopify store.
What is a Sub Collection (Sub Category)?
Sub collections allow you to further subcategorize your products to create an even more guided shopping journey for your customers. They’re like child collections under a broader parent collection. Under each main collection, you can create a subcollection for relevant products under each umbrella.
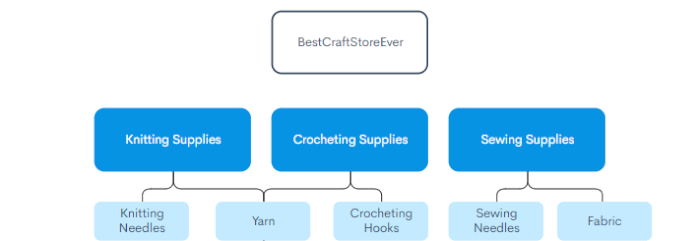
Let’s say your Shopify store sells craft supplies.
Naturally, you would like to create a collection for each major product category like knitting, crocheting, and sewing.
Under each main collection, you can create a subcollection for relevant products under each umbrella—in this case, we could have knitting needles, yarn, fabric, etc.
But that’s not all—what about plastic knitting needles versus metal ones?
What about different colored yarns?
Subcollections within subcollections can get confusing quickly.
Instead of using several nested subcollections, those smaller product specs are where product tags start coming into play.
We’ll get into those in a few minutes 😊
Collections vs. Categories vs. Subcollection vs. Subcategories
Depending on where you’ve read about sub collections and link lists in Shopify, you might’ve heard the terms “categories” and “sub categories” tossed around.
These mean the same thing as collections and sub collections in Shopify.

When some people talk about Shopify categories, they’re really referring to the collections feature we’re discussing here. It’s simply a misnomer.
Collections refer to the practice of putting products into categories in your Shopify store, and this is entirely different from using a link list.
This means it’s not technically inaccurate to refer to Shopify subcollections as sub categories, but it’s confusing to mix up the terms.
What Are The Benefits Of Sub Collections?
1. Better Navigation Experience
Sub collections are a great way to show people what your shop has to offer and make it easier for people to navigate through your store.
User experience is a huge part of any purchase, and it’s one of the main factors that will influence whether or not someone will buy your product or service.
2. Higher Cross-Sell
They can also help you creatively position your products to boost sales.

For example, you can add sub collections to group products that are sold separately but come together to form a complete package—think party supplies, sporting goods, or cookware.
You could also use sub collections to curate gift packages for any occasion or season, giving your customers useful ideas while also testing which product combinations sell the best.
This is what’s called a collection list page.
These clever ways to add sub collections to your shopping experience increase your cross-selling potential for you all while helping your users find products they might not even realize they need.
3. Improved SEO
If you organize your sub collection tree properly, it can even help boost your SEO.
A messy website is tough for Google to understand. But Shopify’s subcollections use a smart URL setup that organizes your site clearly, helping Google figure out what you offer and boosting your visibility in search results.
This means Google has more confidence in your site and app when trying to match it to relevant searches, so your pages are more likely to rank better in the search results and get more clicks.
Dedicated Sub Collections vs. Filtering Collections With Product Tags

Collections—and sub collections, by extension—are the macro-level categories your products fall under.
Tags are the micro-level categories that makeup the product’s more unique specifications.
Say you’ve got categories for craft supplies, a sub category for knitting, and a subcategory for yarn products.
Instead of taking the customer further down the rabbit hole of your sub collections page, it’s time to start showing them products to choose from.
The customer wants yarn—but do they need worsted-weight or bulky-weight yarn?
What TPI do they need? How about the color?
These granular product details are better marked off with product tags.
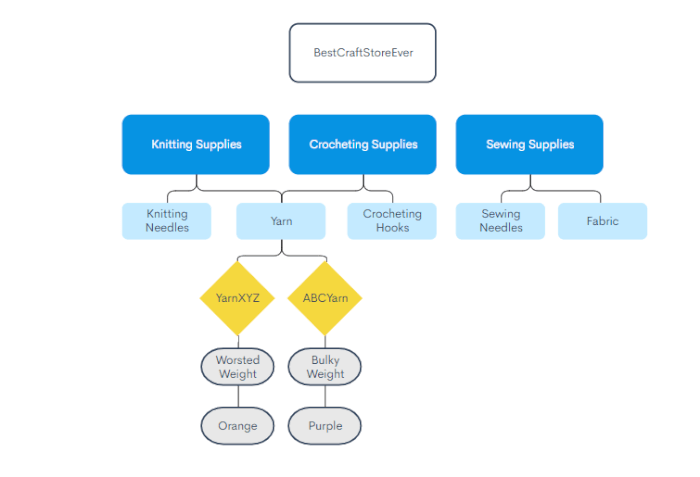
Subcollections guide customers who are unsure about their choices. And if they know they want something specific, like size-3 yellow yarn from Red Heart, your site’s tag system helps them filter and find exactly what they need quickly.
With well-organized sub collection URL structures and product tag filters, any user can find what they need whether they know what it is or not!
How To Create A Subcollection In Shopify
- Create A Template For Sub Collection Pages
- Add Your Theme Code
- Add Your New Subcollection Page
- Add Subcollection To Your Navigation Menu
Note that not every Shopify theme will work with sub collections.
All free Shopify themes will work (and even include free customer support from Shopify) but paid themes published by third-parties may show mixed results.
Some themes like Out of the Sandbox offer built-in sub collection pages as seen here.
Check with your site theme’s developer and read user reviews to find out more about your specific theme’s compatibility.
1. Create A Template For Sub Collection Pages
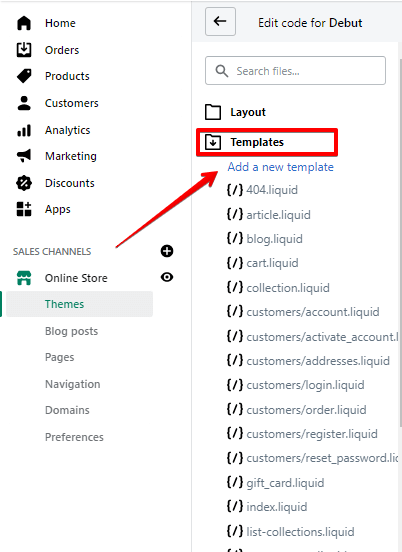
Login to your Shopify admin panel and select Online Store then Themes.
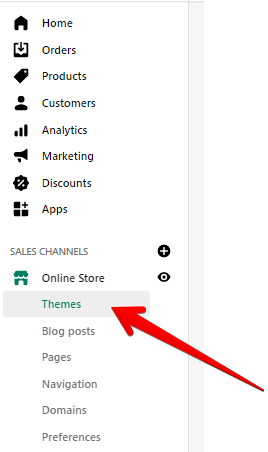
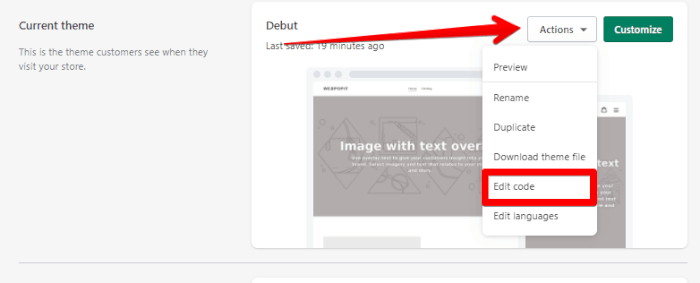
In the center pane select the Actions menu and click Edit code.
Under the Templates folder click Add a new template.
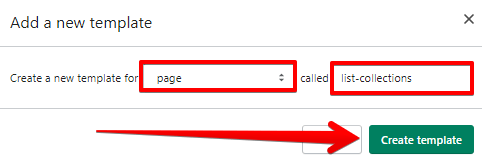
In the popup window, select from the drop down menu and call it:
list-collections
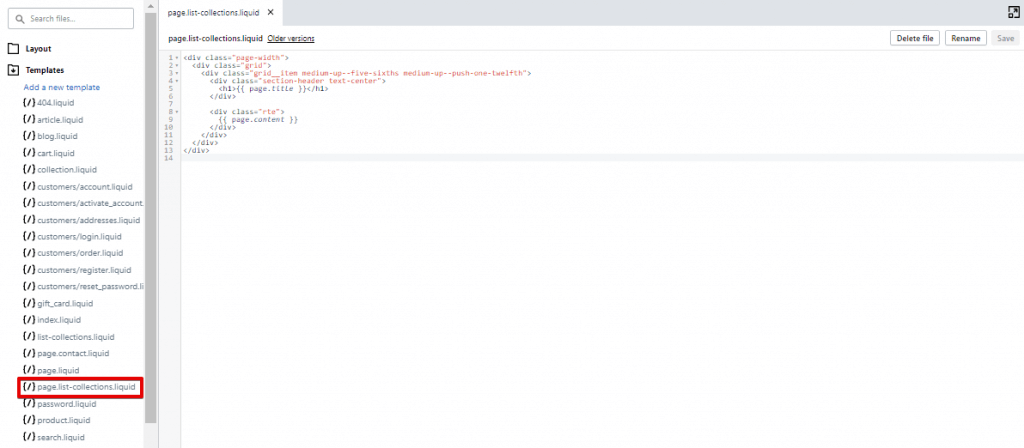
This will create an entry in the Templates section labeled:
{/}list-collections.liquid
Upon clicking, you’ll see a window with a few prefilled lines.
2. Add Your Theme Code
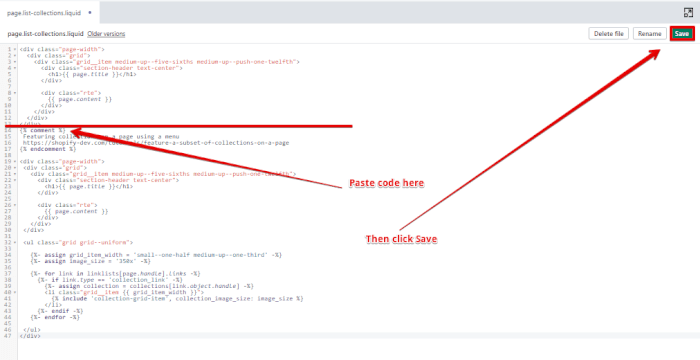
Next you’re going to add a block of code to the end of your new entry, but what you add depends on your Shopify site theme.
In this example, I’m using the “Debut” theme. You can find the specific code for your theme on this Shopify support page.
Paste the theme code at the very end of the existing block in your list-collections file.
Click Save.
3. Add Your New Subcollection Page
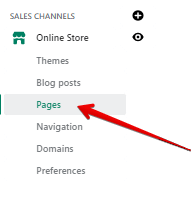
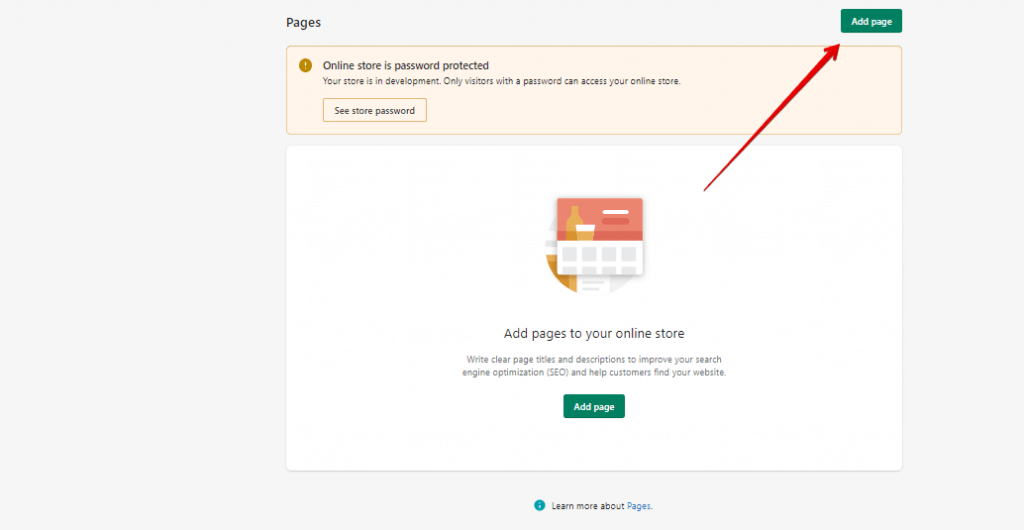
From the left-hand navigation pane, look under Online Store and select Pages.
Click Add page.
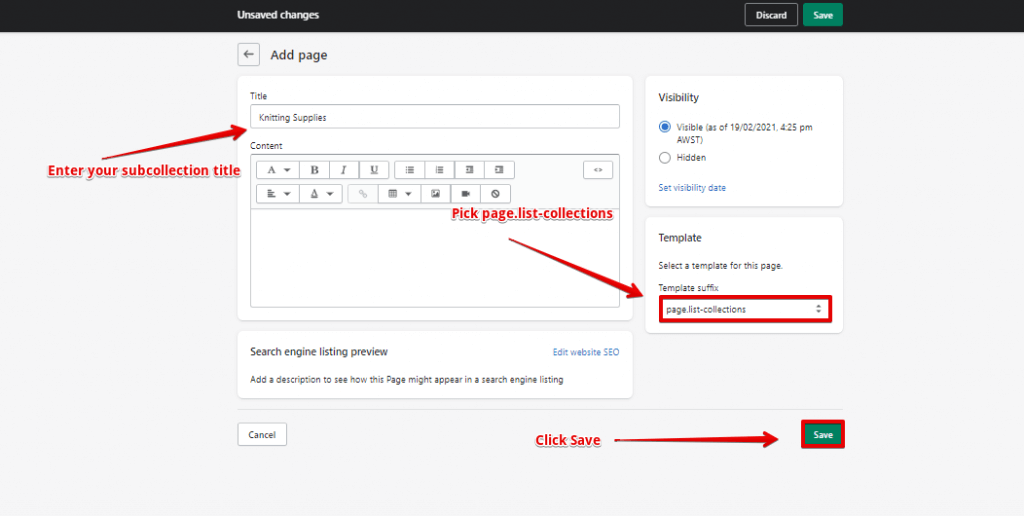
Enter the title for your subcollection.
Whatever name you enter here will show up in your navigation menu for this subcollection.
In the Template pane, select your page.list-collection template from the drop down menu.
Click Save.
4. Add Subcollection To Your Navigation Menu
By now, your new subcollection page is live and ready for setup.
You just need to add it to your navigation bar link list to help users find it.
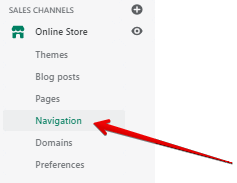
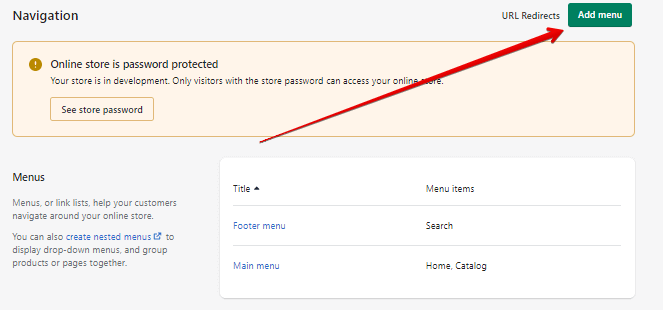
On the left-hand side, under Online Store click Navigation.
Click on Add Menu.
Add the same title you used above in step three then click Add menu item.
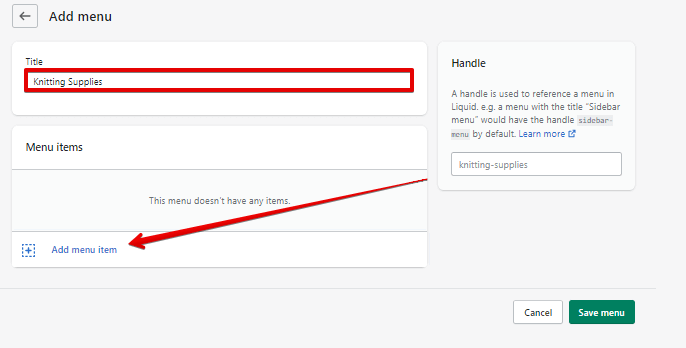
In the Name section, enter the title you’d like for your subcollection.
In the Link field, don’t paste your URL—instead, click on the space and pick the menu option titled Collections.
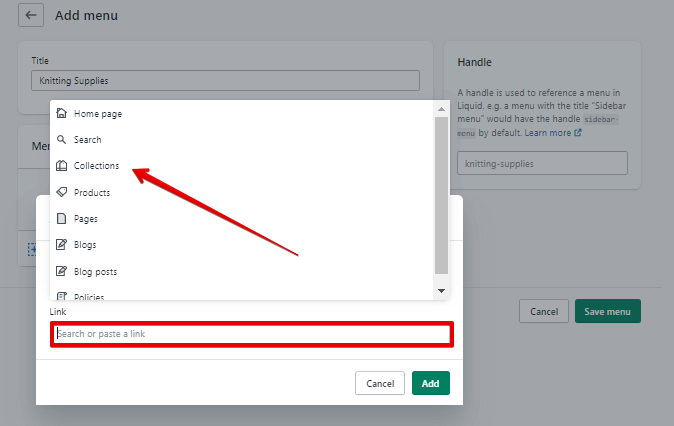
You’ll be able to select any Collection page you’ve created, and now they’ll be nested as child collections under your parent collection page!
How To Filter Shopify Collections With Product Tags
- Check Whether Your Theme Has Built-In Tag Filtering
- Manually Add Tag Dropdown Navigation Menus
- Manually Create Tag Radio Buttons
Just like with subcollections, you’re going to edit your Shopify theme settings to add product tag filters to your site.
BTW—make sure you’ve added tags to your products first by following these steps.
1. Check Whether Your Theme Has Built-In Tag Filtering
Most themes nowadays have tag filtering options, you just have to know where to find them in your Shopify admin.
In the left-hand navigation link list, find Online Store and click Themes.
Click Customize.
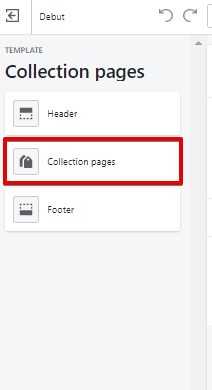
Pick Collection Pages from the dropdown menu at the top of the page.
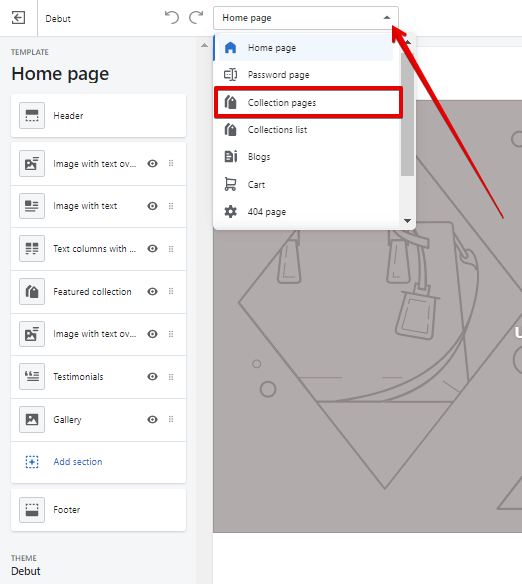
On the left-hand side, click Collection Pages again.
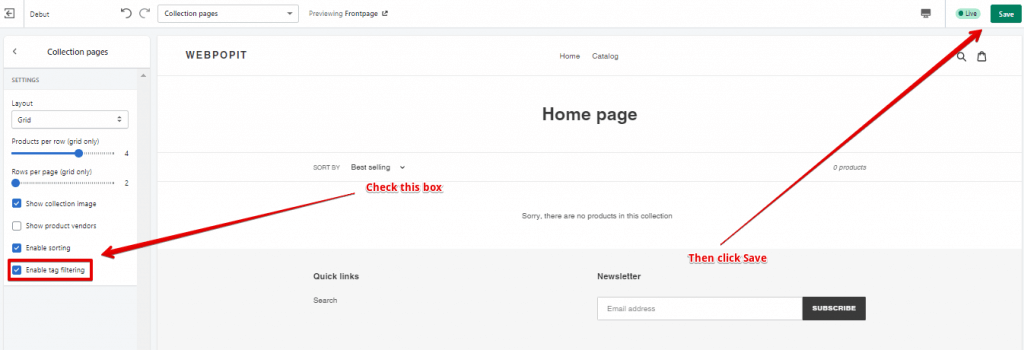
If your theme editor natively supports tag filters, you’ll see a checkbox called Enable tag filtering.
In some themes, this checkbox might be labeled Enable filtering by tag or some other variation.
If it’s there, check the box, click Save, and you’re done!
If no such checkbox appears, you’ll have to add your product collection tags manually.
2. Manually Add Tag Dropdown Navigation Menus
You can either use dropdowns or radio buttons, but trying to use both may result in errors so I recommend sticking to one option.
In the center pane select the Actions menu and click Edit code.
Under the Templates folder select the item called:
{/}collection.liquid
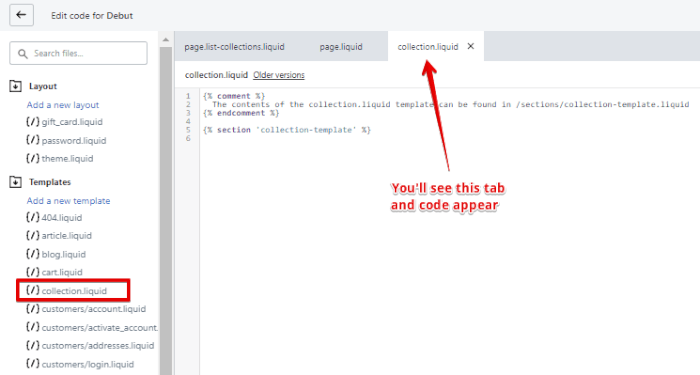
Paste the following code into this file:
<div class="clearfix filter">
  <p>Browse by tag:</p>
  <select class="coll-filter">
    <option value="">All</option>
    {% for tag in collection.all_tags %} {% if current_tags contains tag %}
    <option value="{{ tag | handle }}" selected>{{ tag }}</option>
    {% else %}
    <option value="{{ tag | handle }}">{{ tag }}</option>
    {% endif %} {% endfor %}
  </select>
</div>

<script>
  /* Product Tag Filters - Good for any number of filters on any type of collection pages */
  const collFilters = document.querySelectorAll('.coll-filter');

  if (collFilters.length > 0) {
    collFilters.forEach((collFilter) => {
      collFilter.addEventListener('change', function(){
        var newTags = [];
        collFilters.forEach((collFilter) => {
          for(var i = 0; i <= collFilter.length-1; i++){
            if(collFilter[i].selected == true && collFilter[i].value != "") {
              newTags.push(collFilter[i].value);
            }
          }
        });

        if (newTags.length) {
          var query = newTags.join('+');
          window.location.href = '/collections/{{ collection.handle }}/' + query;
        }
        else {
          {% if collection.handle %}
          window.location.href = '/collections/{{ collection.handle }}';
          {% elsif collection.products.first.type == collection.title %}
          window.location.href = '{{ collection.title | url_for_type }}';
          {% elsif collection.products.first.vendor == collection.title %}
          window.location.href = '{{ collection.title | url_for_vendor }}';
          {% endif %}
        }
      });
    });
  }
</script>
Where you paste your code depends on your specific collection setup. You might need to adjust things a bit and experiment to get it just right.
It’s all about finding the perfect spot in your Shopify’s .liquid files for your collection’s needs.
3. Manually Create Tag Radio Buttons
It’s just as easy to create radio buttons as dropdown menus.
Follow the exact same procedure above from step 2, except using the following code instead:
<ul class="subnav clearfix">
  <li{% unless current_tags %} class="active"{% endunless %}>
    {% if collection.handle %}
    <a href="/collections/{{ collection.handle }}{% if collection.sort_by %}?sort_by={{ collection.sort_by }}{% endif %}">All</a>
    {% elsif collection.current_type %}
    <a href="{{ collection.current_type | url_for_type | sort_by: collection.sort_by }}">All</a>
    {% elsif collection.current_vendor %}
    <a href="{{ collection.current_vendor | url_for_vendor | sort_by: collection.sort_by }}">All</a>
    {% endif %}
  </li>
  {% for tag in collection.all_tags %}
  {% if current_tags contains tag %}
  <li class="active">
    {{ tag | link_to_remove_tag: tag }}
  </li>
  {% else %}
  <li>
    {{ tag | link_to_tag: tag }}
  </li>
  {% endif %}
  {% endfor %}
</ul>
<style>
  .clearfix:before, .clearfix:after { content: ""; display: table; }
  .clearfix:after { clear: both; }
  .clearfix { zoom: 1; }
  /* Subnavigation styles */
  .subnav { clear: both; list-style-type: none; margin: 35px 0; padding: 0; }
  .subnav li { display: block; float: left; }
  .subnav li a {
    display: block;
    height: 28px;
    line-height: 28px;
    padding: 0 7px;
    -webkit-border-radius: 7px;
    -moz-border-radius: 7px;
    border-radius: 7px;
    background: #eee;
    margin: 0 7px 7px 0;
    color: #666;
  }
  .subnav li a:hover, .subnav li.active a {
    background: #666;
    color: #fff;
  }
</style>
Just like with dropdown menus, you’ll probably have to play around a bit to find the best place to position your radio buttons.
")
")