Organic search engine traffic is super important. If all your visitors disappear when you stop paid ads, getting banned from your ad account could really hurt your business.
SEO can be a way to create a consistent base of online sales while increasing your profit margins. One key aspect of SEO for your Shopify store is adding a sitemap.
Why Add A Sitemap To Your Shopify Store?
Adding your Shopify sitemap to Google Search Console helps Google spot and list your site’s important pages, boosting your store’s visibility. This way, your products and posts can show up higher in search results, attracting more shoppers to your business.
Sure, Google can still find your pages without a sitemap. However, it’ll take a longer time for Google to find your content and index them, which can hurt your visibility in search results and affect your business.
All Shopify stores automatically create a sitemap XML file that contains links to all of your blog posts, collections, products, pages, and product images. As you continue building your store, these links will be categorized into the sitemap.
What is A Shopify Sitemap?
A Shopify sitemap is a file that shares information with Google regarding the relationship between pages in your Shopify store. This sitemap.xml file generates links to all of your marketing pages, products, blogs, and categories. The sitemap.xml can’t be adjusted manually.
Search engines use these files to understand your site better. They learn how often you update pages and if you have pages in different languages, helping them show your site correctly in search results.
An e-commerce store can improve SEO by submitting a sitemap because they usually consist of extensive product pages and are added frequently. When you are building a sitemap, it helps improve the visibility of each page since there may be relevant phrases or keywords.
What’s Inside The XML Sitemap Files?
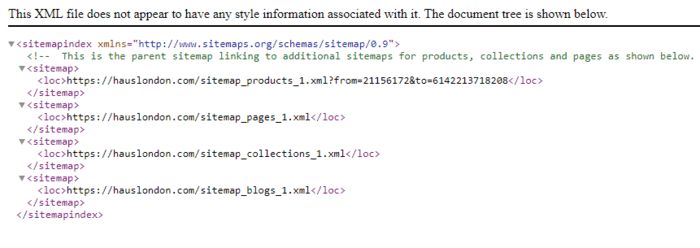
Sitemap Index File
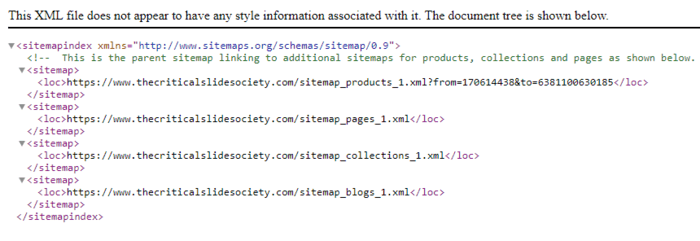
This file consists of all your website’s sitemap links. These sitemaps can be further categorized as child sitemaps and broken down into different page types.
For a Shopify store, it will contain at least four different child sitemaps which include:
- Collections pages
- Product pages
- Blogs
- All other pages
These groupings help distinguish the components inside of your sitemap.xml. If your Shopify site has a wide selection of products, the Shopify app will be building out other child sitemaps for your index file. Once the initial sitemap has reached above 5,000 URLs, additional sitemaps will be created. Shopify sitemaps can’t have over 50,000 URLs, so building these extra child sitemaps helps them stay under the limit.
Child Sitemap File
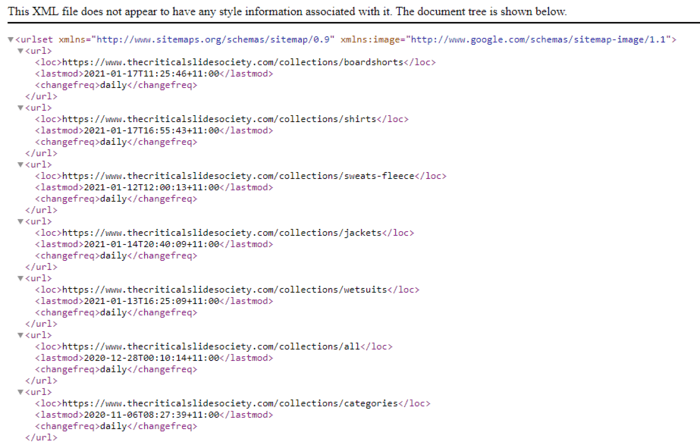
You’ll find a list of URLs within any given child sitemap. These links belong to that particular page type. This improves SEO by giving Google and other search engines a list of URLs within your category that Google can categorize. Google won’t have to crawl through your site and files to determine how to categorize each link. They can easily find your site’s content without relying on your site architecture.
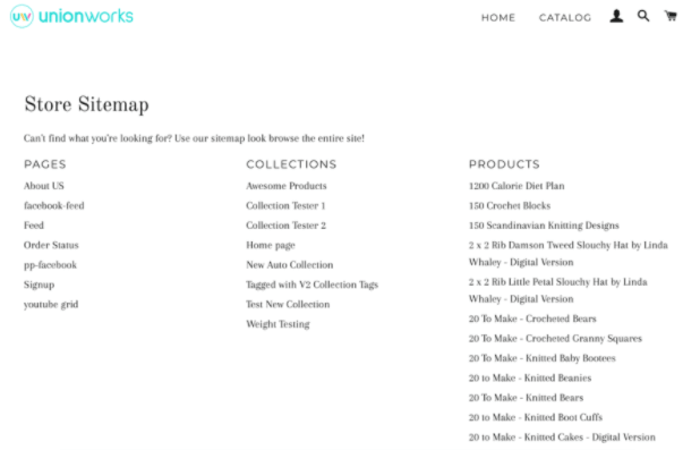
What’s An HTML Sitemap?
An HTML sitemap is an HTML page that lists out all of the pages of a website. Unlike XML sitemaps, they are mainly created for website visitors to get a summary of your site structure and navigate to the page they need. It’s another way for crawlers from search engines to navigate through all of your store’s pages.
However, these are typically not updated automatically and you have to update your sitemap regularly to keep it up to date. Apps such as SEO HTML Sitemap enable you to generate sitemaps quickly.
How To Add A Sitemap To Shopify
Luckily, you don’t have to spend time building a sitemap for Shopify since they automatically create one for you. Simply locate your Shopify sitemap file and submit it to Google for review.
An easy way to find your Shopify sitemap is by typing your main domain and adding the “/sitemap.xml” to the end of the URL.
From there, you’ll find a page with your store XML file. Although you have this link, you may want to save the XML file onto your computer if something happens to your store.
How To Verify Your Shopify Site in Google Search Console
Verifying your site proves to Google that you’re the owner of your online store. Once the verification is complete, you will have data provided by Google and can see how your site performs on the search rankings in Google Search Console.
Before you can complete the steps to verify your Shopify store, make sure your store is live by disabling the password protection. If you aren’t ready for the store to be live, enable the password protection after the verification process is complete.
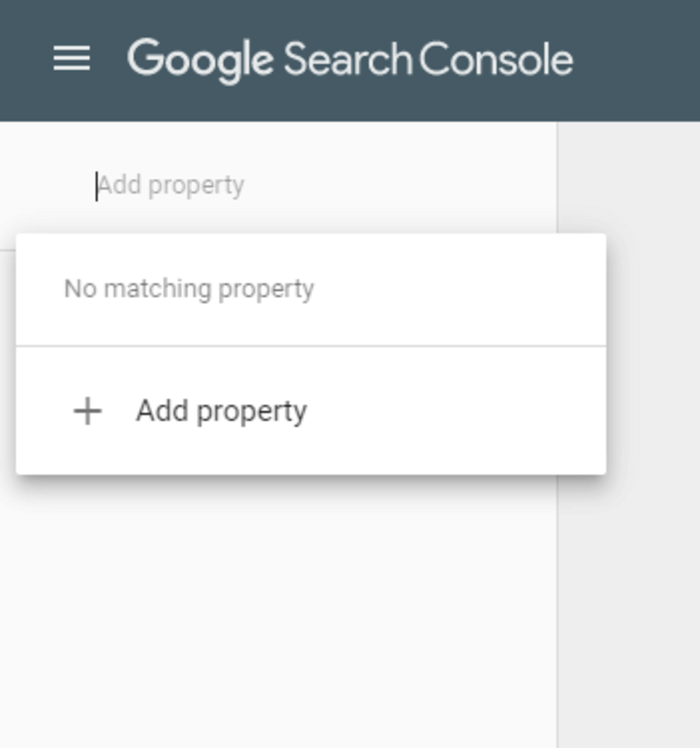
Once your store is live, head to Google Search Console. Select their drop-down menu and click Add property.
You’ll see two options to verify your website. Verifying your site requires either a custom domain or your myshopify.com domain.
Verifying A Custom Domain
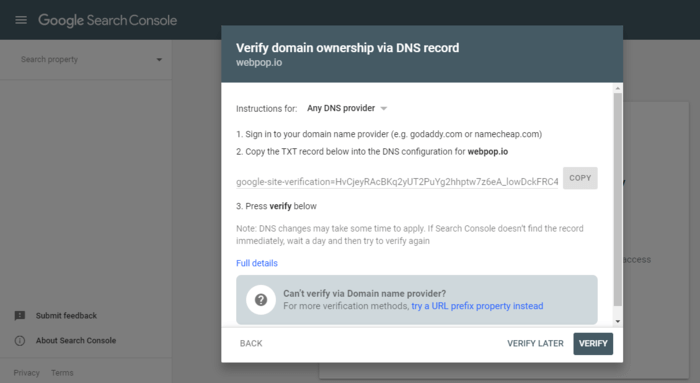
If you have a custom domain, you can use either verification method. If you opt for the Domain method, type in your URL without the https:// and you’ll be prompted to do a DNS verification.
Verifying A MyShopify.com Domain
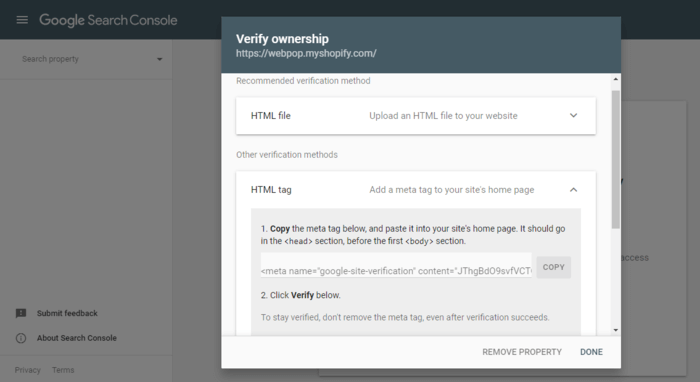
If you’re using a myshopify.com domain, you can only use the URL prefix option. Type in your myshopify.com domain. By default, Google prompts you to do an HTML file option. You can choose to do so, but the simpler way is to click the down arrow next to the HTML tag option. You’ll see a meta tag code that you can highlight and copy.
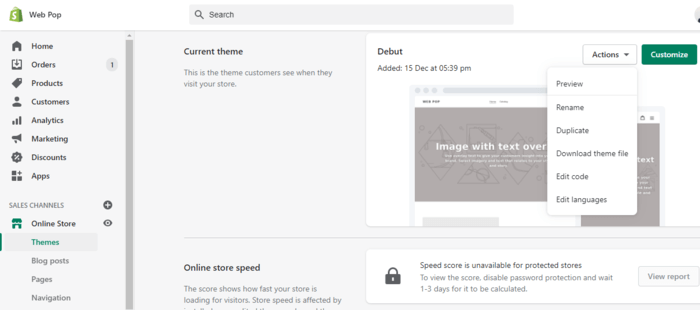
Go to your Shopify dashboard and click on Online Store. Select the Themes tab and choose the theme you’d like to edit. It’s important to note that Google will only publish a live theme that you select here instead of all of your themes.
Under the Actions button, click Edit code.
In the Layout portion of the code, select theme.liquid to edit the code inside of the file. At the top of the editor, you should see the <head> tag.
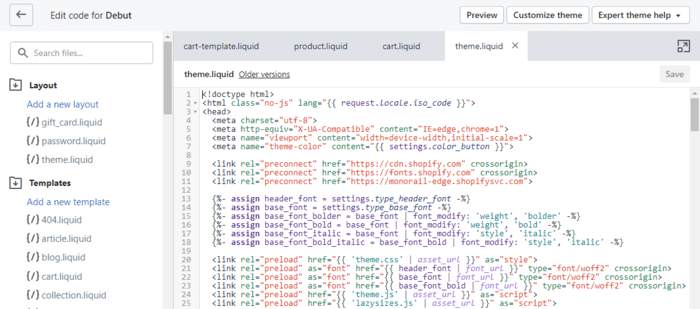
Paste the HTML tag you previously copied directly underneath the <head> tag.
Click Save to finish.
Go back to the Google Console and tap on the Verify button in the HTML tag section.
If you need to re-verify or add a new sitemap, you can always go back to your Google Console dashboard and select Add Property. Once you’ve completed your verification, you can now add a sitemap for your store.
How To Complete Google Verification For Shopify
- Go to Google Search Console and Add Property.
- Type in your Shopify URL under the URL Prefix option.
- Select the dropdown under the HTML tag verification method.
- Copy the meta tag onto your clipboard.
- Go back to your Shopify Admin. Click Theme.
- Select the Theme you want to make changes to. Click on Actions, and then Edit code.
- You’ll see a list of files for your code. Tap on the theme.liquid to open the files in the online code editor.
- Under the tag, paste the meta tag.
- Click on Save.
How To Submit Your Shopify Sitemap To Google Search Console
Head back to your Google Search Console. Once you’re in the dashboard, go to Sitemaps.
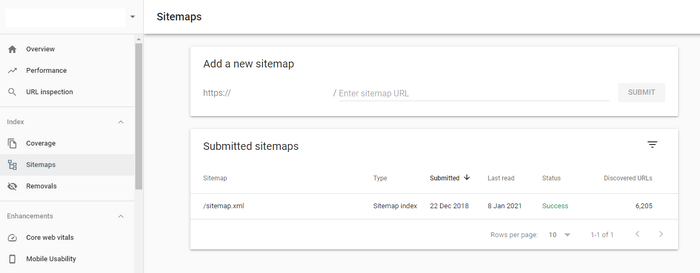
Under Add a new sitemap, type in the link to your XML sitemap. Entering the link to anything else other than your XML sitemap will result in a Google error. Click Submit.
A pop-up will appear indicating that your sitemap has been submitted to the Google search console successfully.
Under the Submitted sitemaps section, the status should show Success in green to indicate that you’ve successfully submitted your Shopify sitemap.
Once you are done submitting your sitemap, Google will crawl and index your website. Google will only index websites and pages that are live.
Don’t be alarmed if not all of your pages on your Shopify store is indexed or crawled. Google has stated that it’s normal for some pages on your website not to be indexed since it takes time to crawl. Unfortunately, Google doesn’t provide or guarantee any specific timeline for the completion of their indexing process.
How To Submit A Sitemap To Google Search Console
- Click Sitemaps in Google Search Console.
- Type in the link to your sitemap under Add new sitemaps.
- Click Submit.
- You should see a popup and your new sitemap listed under the Submitted sitemaps section.
Common Errors When Submitting Sitemap to Google Search Console
Couldn’t Fetch the Sitemap Error
Sometimes you’ll have an error such as a message from Google Console stating that they couldn’t fetch the sitemap. Make sure that your Search Console property is set up correctly and you can consider removing and adding the property again as a last resort.
Indexed, Not Submitted in Sitemap Error
Sometimes Shopify may report your URLs on your site as “indexed, not submitted in the sitemap.” Here are the common reasons for this:
- Pagination: Pagination are typically excluded from the sitemap
- /collections/all/pages: Shopify doesn’t submit or include these URLs into the sitemap.xml file
- False positives: URLs here are detected but may not appear on Google Console.
If you run into problems submitting or building your sitemap, Google Webmasters has a support team to contact or an entire library of support resources such as FAQ aand troubleshooting articles.
Conclusion
Fortunately, adding a Shopify sitemap is something you only have to do once for your e-commerce site. You typically also don’t need to verify your online store in Google Search Console multiple times. Once you submit your sitemap, you’ll start getting some data in the Performance tab to see how many people are visiting your site from organic search.
")
")